
Add New Estimates (IssueView)
This guide explains how to add a new estimate or resource to a project. The process involves selecting a resource, specifying its quantity, and optionally adding comments. Additionally, this will also explain the modification of key details of any particular project / issue.
Adding a New Resource to a Project
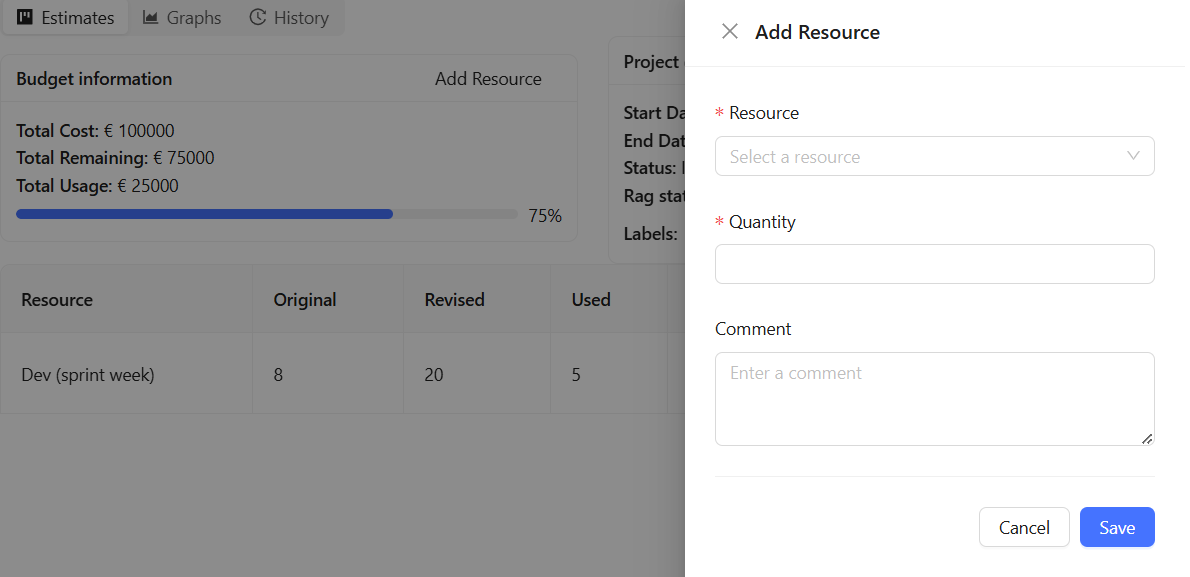
When you click the "Add Resource" button, a drawer opens where you can enter the details of the resource you want to add.
Steps to Add a New Resource:
Open the Add Resource Drawer
Click the "Add Resource" button.
The Drawer component opens, displaying a form.
Fill in the Form Fields
Resource:
Click the dropdown under "Resource."
Select a resource from the list.
This list contains resources that are not already associated with the current issue/project.
Quantity:
Enter the required quantity of the resource.
Must be at least 1.
Comment (Optional):
Enter additional details if necessary in the Comment text area.
Submit the Form
Click "Save" to submit.
Close the Drawer
If needed, click "Cancel" to close the drawer without saving.
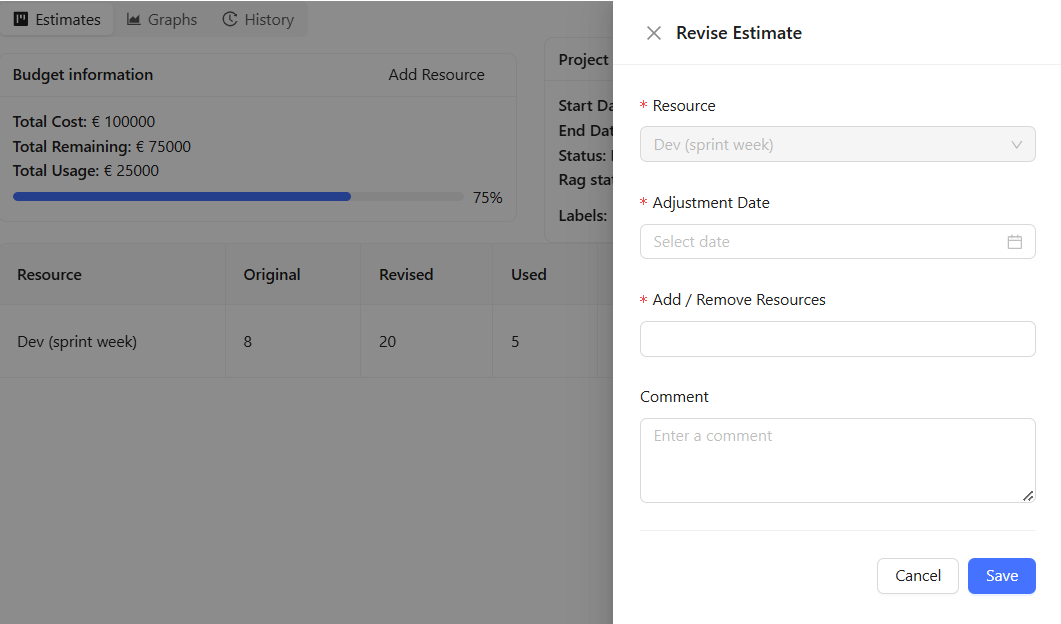
Revising an Estimate
If an estimate has already been created but needs modification (e.g., changing the resource quantity), use the Revise Estimate drawer (edit icon).
Steps to Revise an Estimate:
Open the Revise Estimate Drawer
Click the "Revise Estimate" button.
The Revise Estimate drawer opens.
Fill in the Form Fields
Resource (Read-Only):
The resource is pre-selected and cannot be changed.
The dropdown is disabled.
Adjustment Date:
Pick a date when the change should take effect.
Add/Remove Resources:
Enter the number of resources to add or remove.
Negative (-) indicates removal of resources.
Comment (Optional):
Add a reason for the adjustment.
Submit the Form
Click "Save" to submit.
Close the Drawer
Click "Cancel" to close the drawer without saving changes.
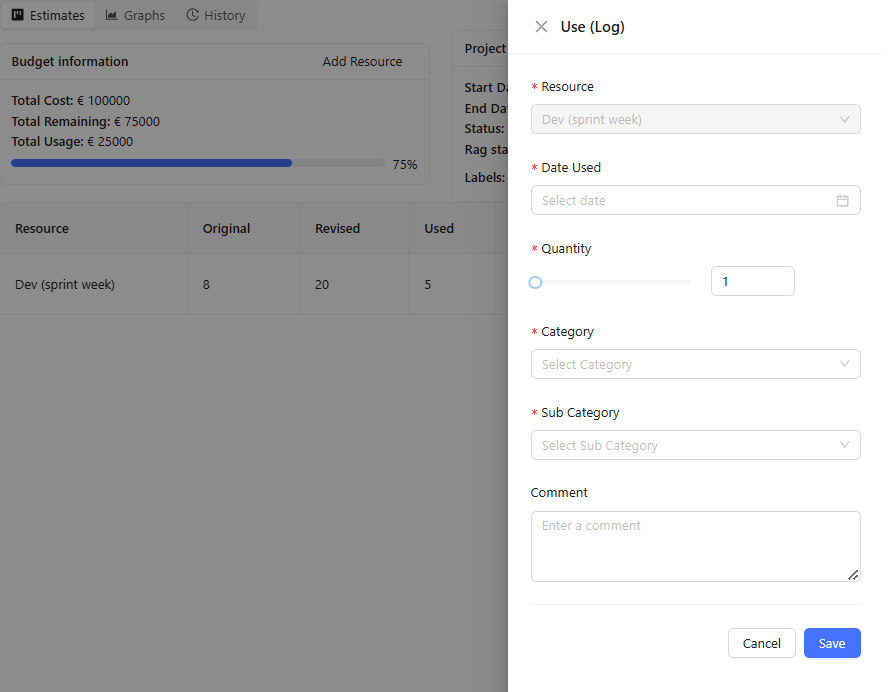
Logging Resource Usage
When you use a resource, you need to log its usage, specifying the amount used, the date, and a category/sub-category.
Steps to Log Resource Usage:
Open the Usage Estimate Drawer
Click the "Use (Log)" button (tick icon).
The Drawer component opens, displaying a form.
Fill in the Form Fields
Resource (Read-Only):
The dropdown is disabled because the resource is pre-selected.
It ensures users cannot accidentally change the resource being logged.
Date Used:
Select the date when the resource was used.
Users cannot select a future date (only today or past dates).
Quantity:
Use the SliderInput component to set the quantity.
Validation Rules:
Cannot exceed the remaining quantity from selected estimate.
Cannot be 0 (no usage).
Cannot be negative (ensures valid logging).
Category & Sub-Category:
Category: Select from predefined budget categories.
Sub-Category: Populated dynamically based on the selected category.
Comment (Optional):
Enter additional details if necessary.
Submit the Form
Click "Save" to submit.
Close the Drawer
If needed, click "Cancel" to close the drawer without saving.
Steps to Delete a Resource
Click the Delete Button
Each resource has a Delete button.
Clicking it opens a confirmation popover instead of deleting instantly.
Confirm or Cancel
Confirm: The resource is deleted from the project.
Cancel: The resource remains unchanged.
Update Project Details
The Modify button allows users to modify key details of a project efficiently. It provides an intuitive interface with dropdowns, date pickers, and input fields for updating labels, statuses, and timelines. Users can make necessary changes and save them with ease.
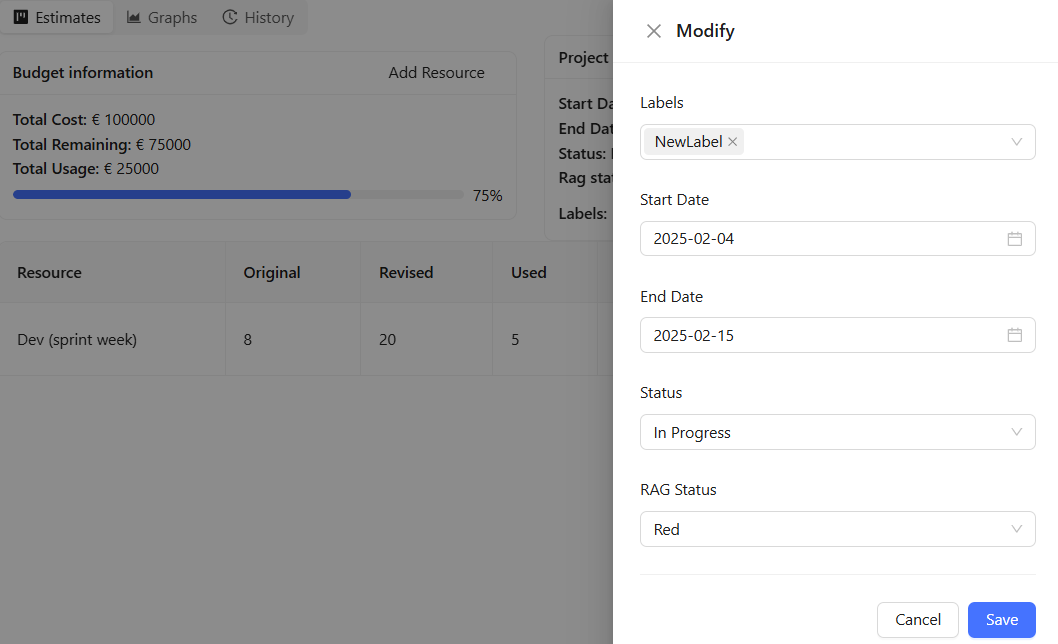
Opening the Drawer
Click the Modify button associated with an issue.
The drawer will slide in from the right, displaying a form with the issue's details.
Editing Fields
Labels: Select existing labels or type a new one to add.
Start Date & End Date: Pick dates while ensuring logical ordering.
Status: Choose a valid status.
RAG Status: Select the appropriate status from the dropdown.
Saving Changes
Click the Save button to submit modifications.
The form will validate inputs before saving.
Cancelling
Click the Cancel button to close the drawer without saving.
History
At the top of the page, there’s a History tab that displays both the Adjustments and Usage sections you’ve clicked on, making it easy to navigate between them and keep track of your activities.
Adjustments
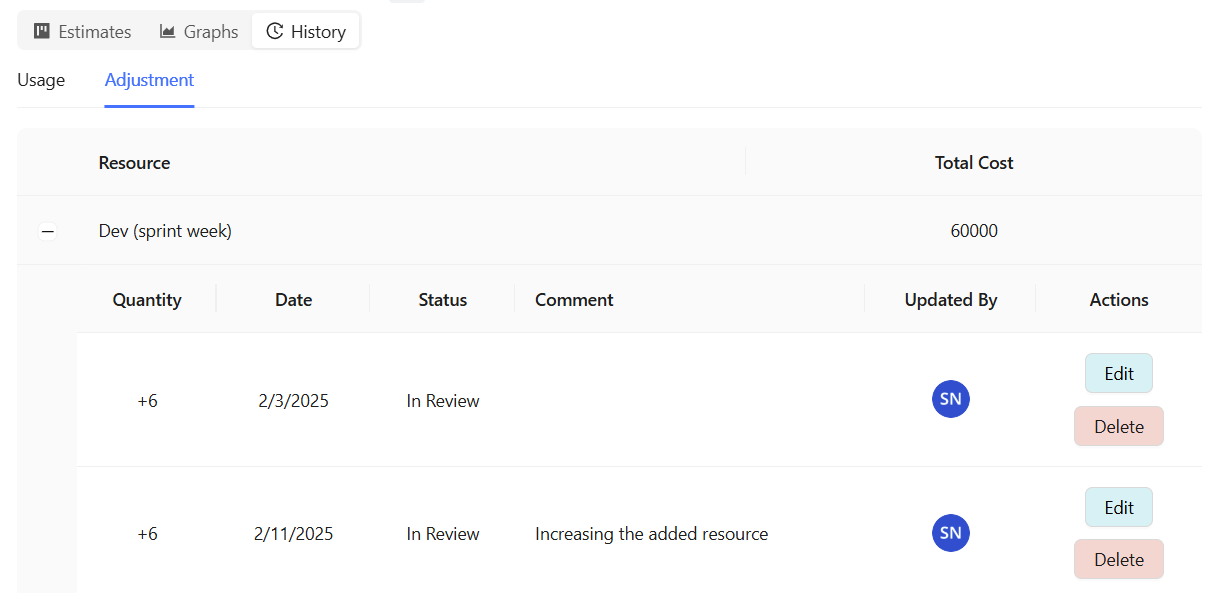
Viewing Adjustments
Once you access the Adjustments section, you will see a table that lists all the resources and any changes that have been made. The columns will display:
Resource: The name of the resource.
Total Cost: The total cost after the adjustment has been made.
Date: The date when the adjustment was made.
Comment: Any additional notes added for the adjustment.
How to View Details
Click on any row to expand it and view more details of the adjustments for that resource, such as the quantity change and the date.
Editing Adjustments
If you need to modify an adjustment (for example, change the quantity or cost), here’s how:
Find the row for the adjustment you want to change.
Click the Edit button on the right of the row.
A form will appear where you can:
Change the quantity or total cost of the resource.
Modify the date of the adjustment.
Add or update a comment to explain the reason for the adjustment.
After making changes, click Save to update the adjustment. The table will automatically refresh to reflect the changes.
Deleting Adjustments
If you want to remove an adjustment:
Find the adjustment row you want to delete.
Click the Delete button next to it.
A confirmation prompt will appear asking if you’re sure you want to delete it. Click Yes to confirm.
The adjustment will be removed from the table, and the data will be updated accordingly.
Usages
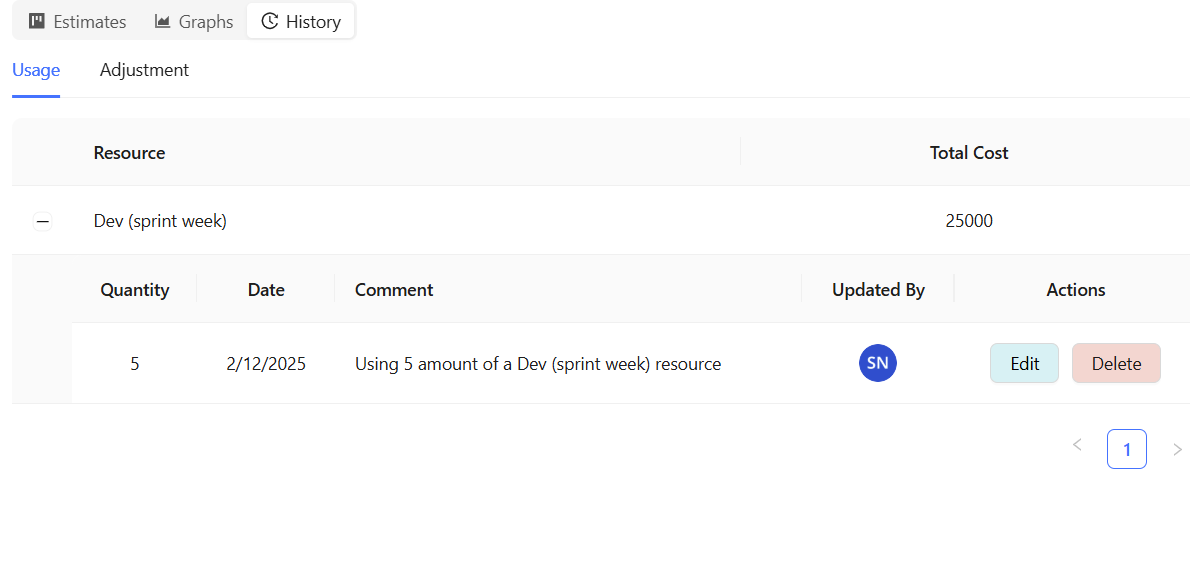
Viewing Usage Logs
In the Usage section, you’ll see a table similar to the Adjustments table, but this one tracks the usage of resources:
Resource: Name of the resource being used.
Total Cost: The cost associated with the usage.
Date: The date the resource was used.
Budget Category: The budget category assigned to the usage.
Budget Subcategory: The specific subcategory within the budget.
How to View Details
Click on any row to expand it and see more detailed information about the usage, including any comments related to the resource's usage.
Editing Usage Logs
To update the details of a usage record:
Find the usage record you wish to modify.
Click the Edit button on the right of the row.
The editing form will allow you to:
Adjust the quantity used.
Modify the date when the resource was used.
Update the budget category and subcategory.
Add or modify a comment explaining the usage.
Once you're done, click Save to update the record. The table will refresh, and the updated usage will be visible.
Deleting Usage Logs
If you need to delete a usage record:
Find the record you want to delete.
Click the Delete button next to it.
A confirmation prompt will appear asking if you’re sure. Click Yes to proceed.
The usage record will be deleted, and the table will update to reflect the removal.