Unless this option is checked, the app will not send any notification emails for this project.
Email template settings
The app uses the same templating format and variables used in the Jira Service Management's own notification system.
For the app's notifications emails to be consistent with those sent by Jira Service Management itself, it is necessary to copy over some configuration.
To copy the settings from Jira Service Management:
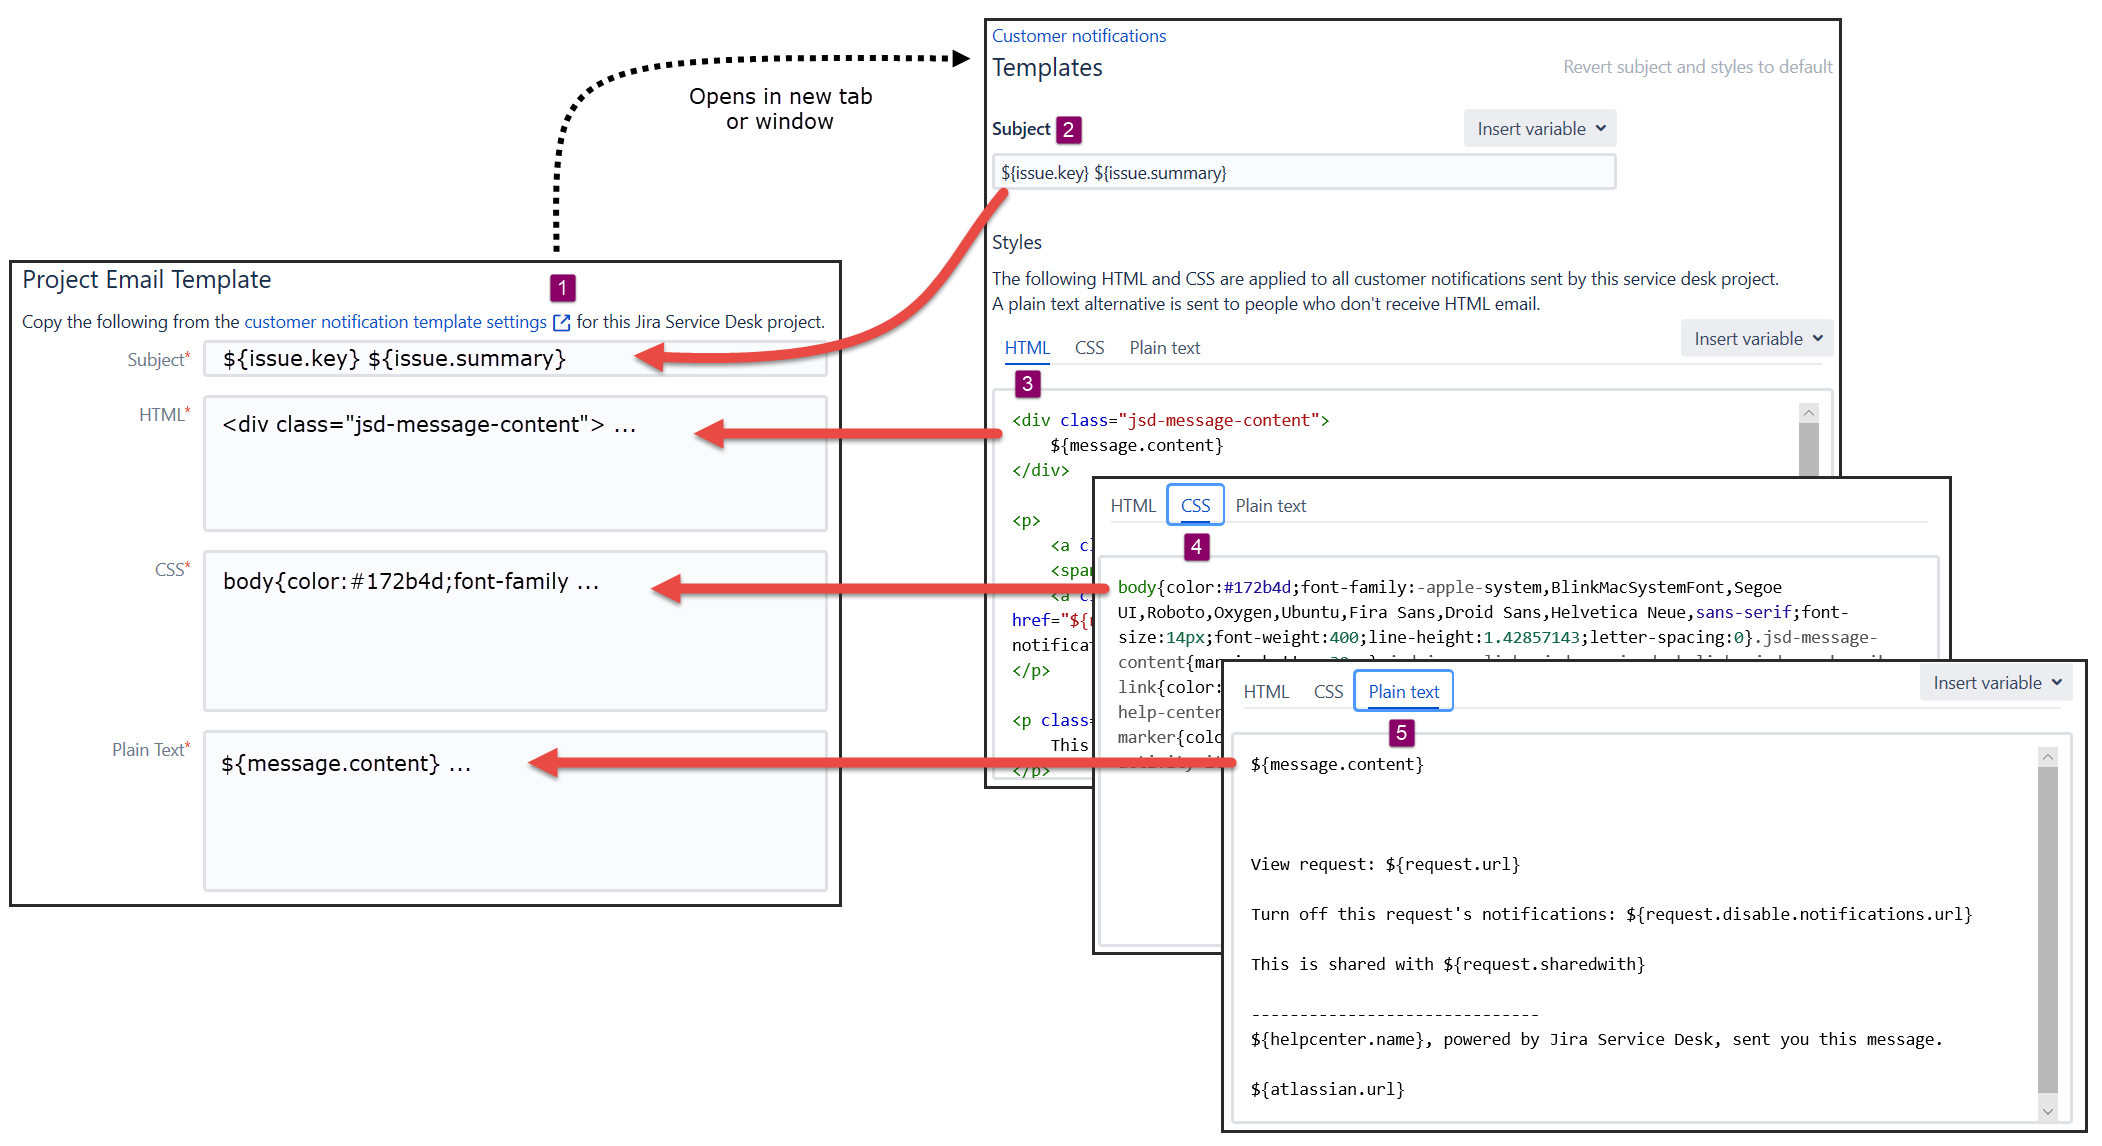
From the app settings page, click on the customer notification template settings link. The Jira Service Management Customer notifications > Templates settings page will open in another tab or window.
Copy the Subject setting string to the app settings form.
Under Styles, copy the HTML string to the app settings form.
Repeat for CSS by clicking on the CSS tab and copying the setting to the app settings form.
Finally, repeat for Plain text.
Notification rules
Again, the app uses the same approach for defining the recipients and content for notification rules as Jira Service Management itself.
The two events that the app replaces are:
Public comment added
Public comment edited
Public comment added
To copy over the settings for public comment added:
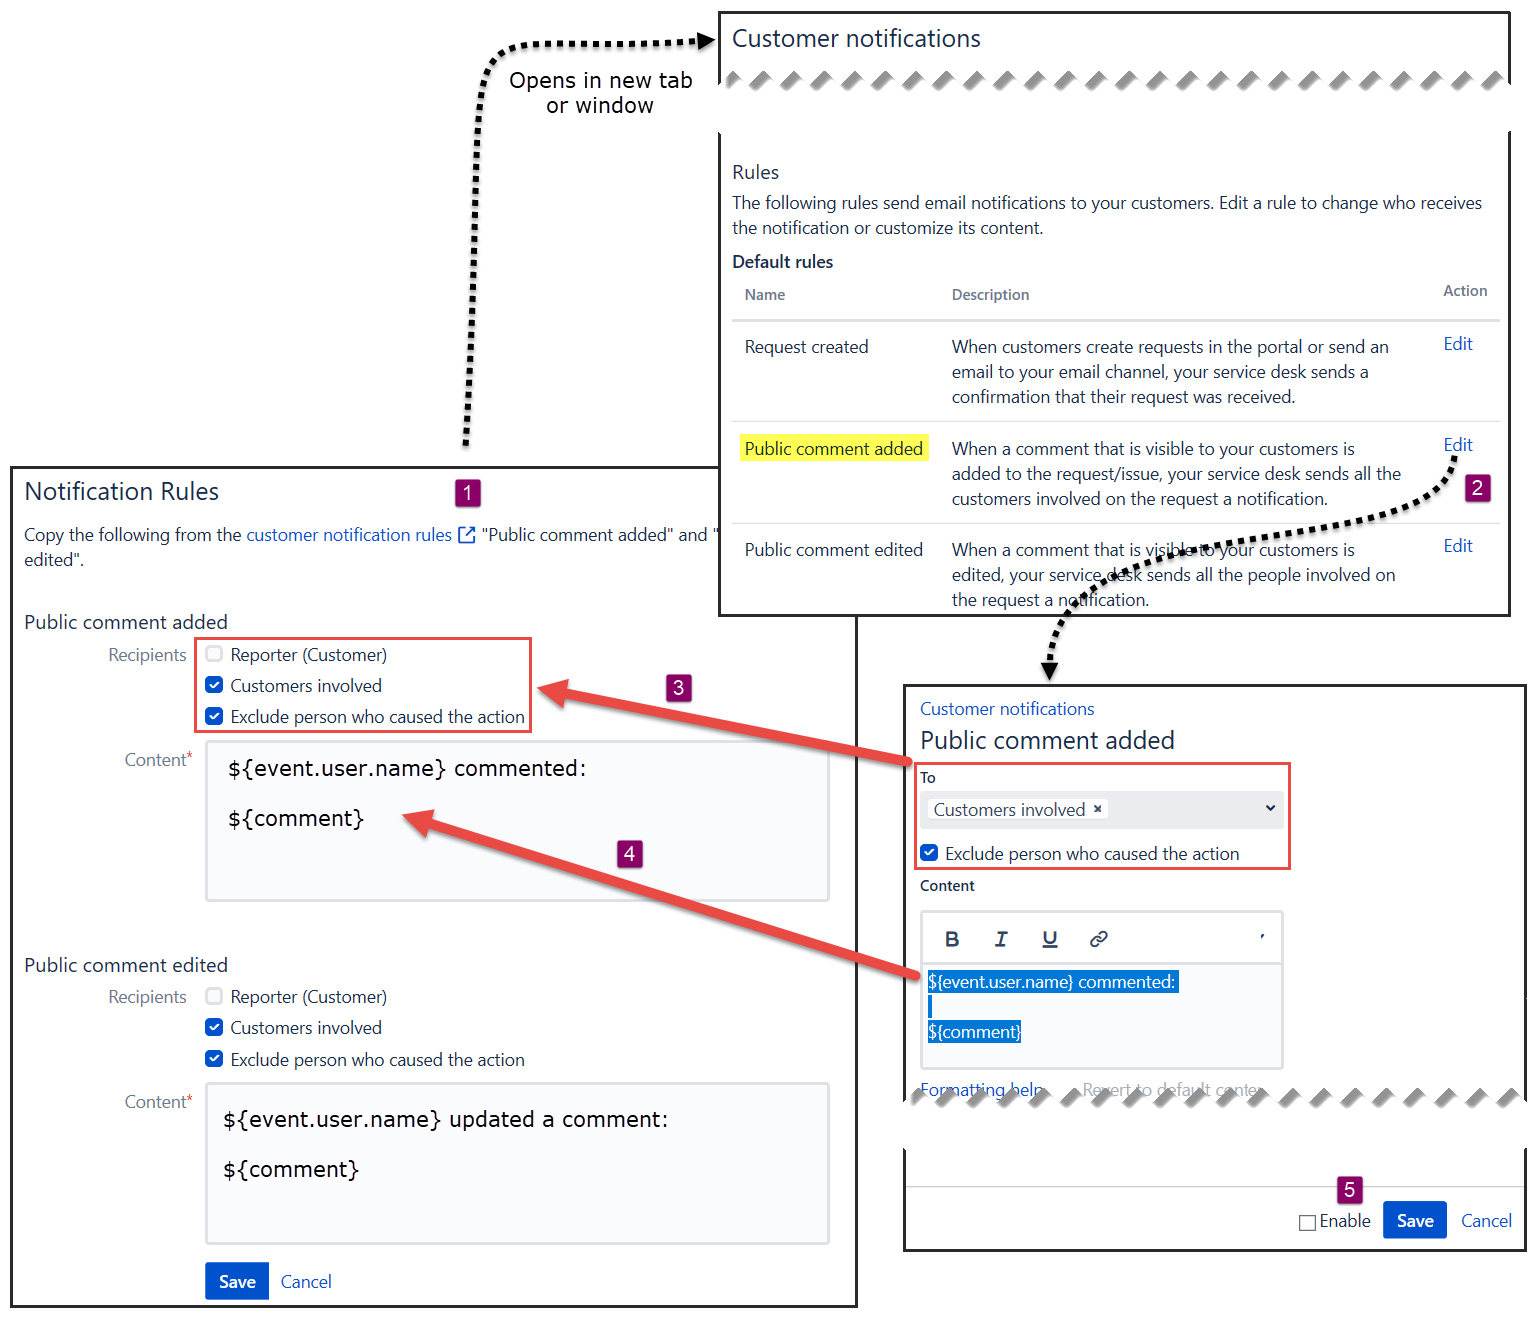
From the app settings page, click on the customer notification rules link. The Jira Service Management Customer notifications settings page will open in another tab or window. Scroll down to the Rules section.
Click on the Edit button for the Public comment added default rule. The settings page for that rule will be displayed.
Set Recipients checkboxes in the app based on the To and Exclude person who caused the action settings in the Jira Service Management rule.
Copy the text of the Content setting to the app settings form.
At the bottom of the Jira Service Management setting page, uncheck the Enable option and press Save.
If you do not uncheck the Enable option, two notification emails will be sent to your users – one from the app and another from the standard Jira Service Management notification rule.
Public comment edited
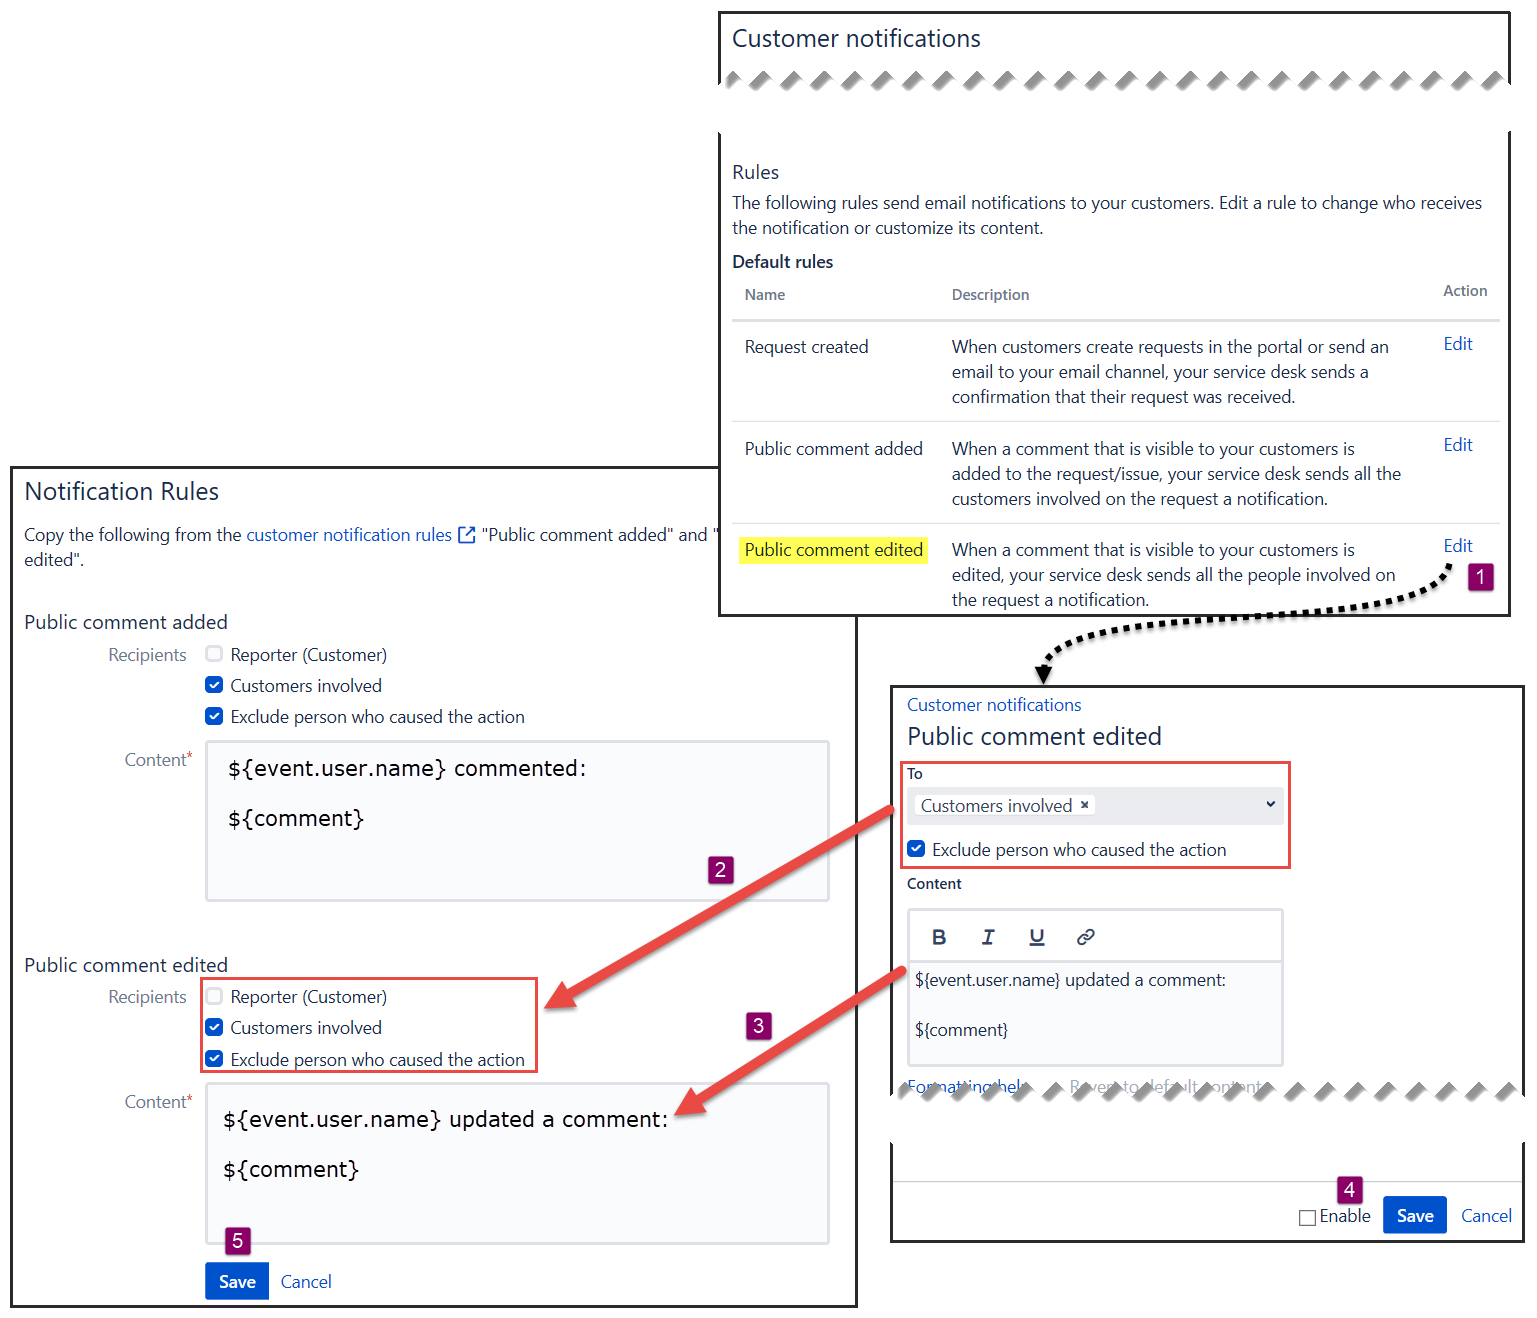
The steps for Public comment added need to be repeated for Public comment edited.
From the customer notification rules page opened in step 1 above:
Click on the Edit button for the Public comment edited default rule. The settings page for that rule will be displayed.
Set Recipients checkboxes in the app based on the To and Exclude person who caused the action settings in the Jira Service Management rule.
Copy the text of the Content setting to the app settings form.
At the bottom of the Jira Service Management setting page, uncheck the Enable option and press Save.
Again, if you do not uncheck the Enable option, two notification emails will be sent to your users – one from the app and another from the standard Jira Service Management notification rule.
In the app settings, press the Save button at the bottom of the form.
Changes will not be saved without pressing the Save button.
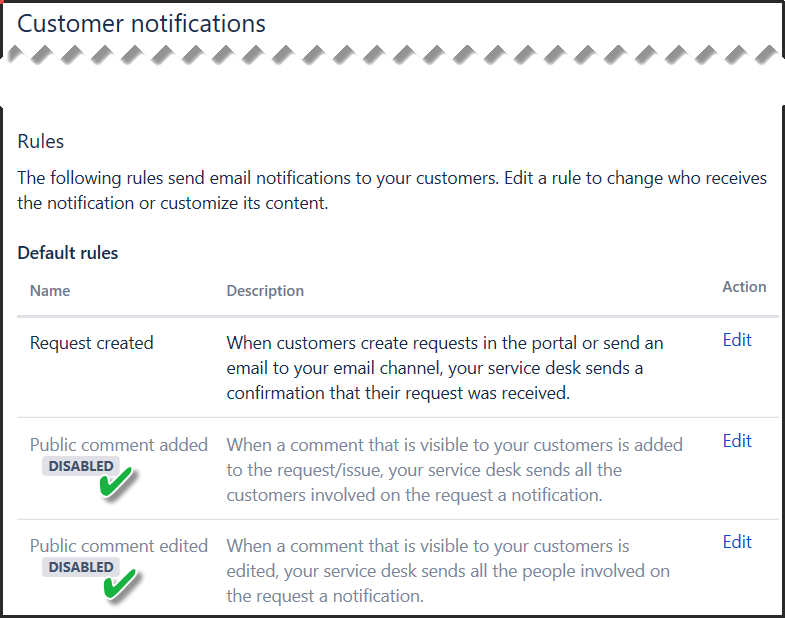
Check Jira Service built-in notification rules are disabled
After following these steps, the default rules in Jira Service Management should look like this:
JavaScript errors detected
Please note, these errors can depend on your browser setup.
If this problem persists, please contact our support.